Build a CSS animated burger menu button using HTML, CSS, Javascript.
Responsive web design is one of the most important factor in modern web development. Almost every website has a navigation menu, but due to less space available on small devices like mobile, tablets and other handheld devices, we design our menus in such a way that they are hidden outside the visible canvas and only shown after we click a button known as menu button or also known as burger menu.
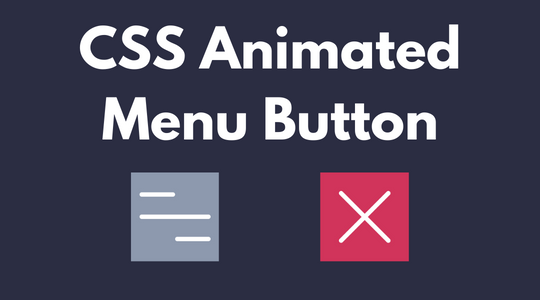
Today we will be creating the burger menu button, with a simple css animation as shown below.
In this article we will go thru the code, so lets get started!!. You can also follow this YouTube video for the tutorial.
HTML
For the HTML markup part we will need the following : A div with a class "menu-btn", this will be our main element, and a div inside to create the bars of the menu icon.
<div class="menu-btn">
  <div></div>
</div>
One might be wondering that there are 3 bars in the icon and we have only used 1 div for it, that is because we will be creating the rest of the bars using css pseudo classes before and after. We will dive deeper in css pseudo classes and many other css concepts in the upcoming articles so stay tuned.
CSS
Here comes the fun part, the css styling : In the above codepen post I have used scss which is a css pre processor, so if you are new to scss or css, in the codepen post you have the option to see the compiled css code.
-
Start with "menu-btn" i.e. main element.
.menu-btn {
width: 60px;
height: 60px;
background: #8d99ae;

display: flex;
align-items: center;
justify-content: center;

cursor: pointer;
transition: all 0.5s ease;
}
First we do the basic width, height and background color. Next important part is the flex styling, we have to center align the inner div so we used align-items and justify-content. Next we add cursor : pointer to show a pointer on hover, and we add a transition to get the smooth animation effect.
-
Next is the div inside menu-btn (.menu-btn > div).
div {
width: 80%;
height: 3px;
border-radius: 2px;
background: #fff;

position: relative;
transition: all 0.5s ease;
}
Here the important thing to remember is the "position : relative;" property, we need this to place the two bars i.e before and after in correct postions relative to the main center bar.
-
Styling before and after, i.e the other 2 bars:
&::before,
&::after {
content: "";

width: 50%;
height: 3px;
border-radius: 2px;
background: #fff;

position: absolute;

transition: all 0.5s ease;
transform-origin: center;
}
We will first style the before and after together as the shape, size and some properties are common. One important property here is the "content : " "; without this the pseudo classes will not render. We can put anything in the content property,but as we will be creating a bar/line we will leave it empty as shown. Another important property is the "position: absolute; this allows us to position the element with reference to its parent, so we can place the bars with respect to the main center bar.
Next we style the before & after seperately to place them in position by using top & right css properties.
&::before {
top: -15px;
}

&::after {
top: 15px;
right: 0;
}
Till now we have seen the code to display the menu button in default state. now we will add css for the close state.
Button close state.
.close {
  background: #d1345b;
  div {
    transform: rotate(225deg);

    &::before {
      transform: rotate(90deg);
      width: 100%;
      top: 0px;
    }

    &::after {
      opacity: 0;
    }
  }
}
First, on close we will change the background color. Next, we will rotate the main div i.e the main middle bar using property "transform: rotate(225deg);" Next, we will place and rotate the before i.e the top bar. Using the main center bar and the top bar we will create the close icon, "X". The bottom bar is hidden using "opacity: 0;" property.
Adding toggle functionality using javascript.
const menuBtn = document.querySelector(".menu-btn");

const addRemoveClass = (className) => {
  if (menuBtn.classList.contains(className)) {
    menuBtn.classList.remove(className);
  } else {
    menuBtn.classList.add(className);
  }
};

menuBtn.addEventListener("click", () => addRemoveClass("close"));
This is a simple javascript code block which will add and remove the close class from our main menu-btn element on click.
Support Us: